

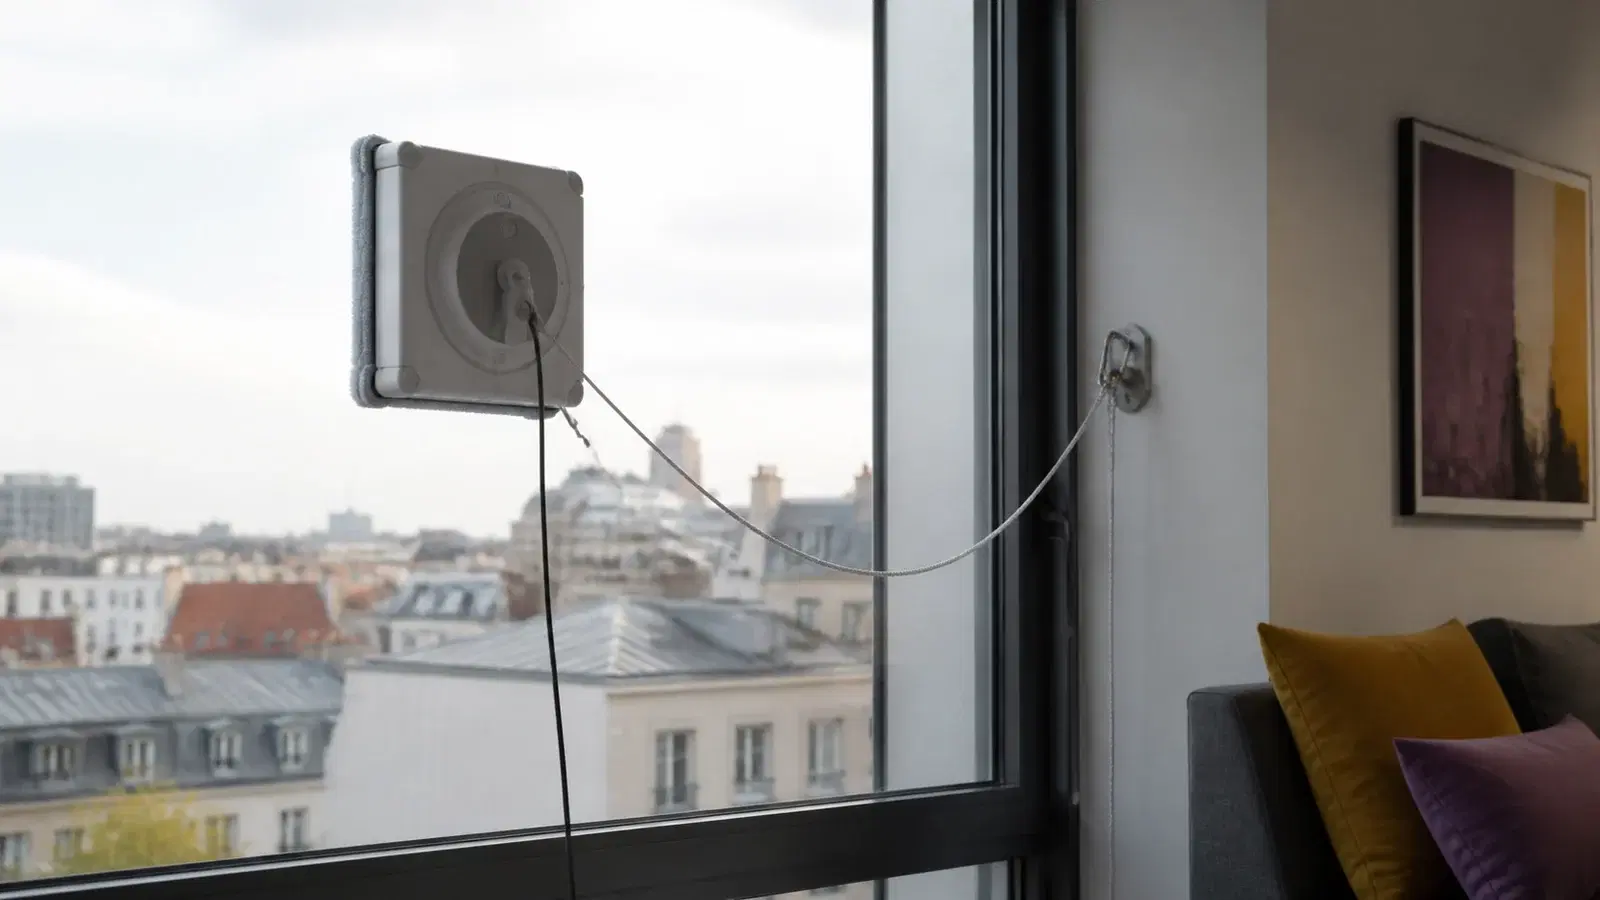
Rent, buy or use a window cleaner?
| Option | When it suits |
|---|---|
| Rent | A large seasonal clean or a trial of one model |
| Buy | Many compatible windows and regular use throughout the year |
| Cleaning service | Hard-to-reach glass, work at height or no reliable safety anchor |
Compare a cleaning service with rental if you cannot place or remove the robot safely. Check the provider's qualifications, working method and liability terms separately — hiring a service is not itself a safety guarantee.
Renting suits a home with several large flat panes cleaned once or twice a year. If most of your panes are small, divided by bars or awkward to reach, you'll spend longer moving the robot than it spends cleaning.
The first rental can double as a trial before buying. Note how many panes it finished, how often the cloths needed changing and which edges still wanted a hand wipe — that's better evidence than any showroom demonstration.
A cycle time isn't the whole job either: add moving the robot, re-anchoring the cord, changing cloths and finishing the edges. Time one pane first, then re-plan the rest of the property around it.
Check the exact model against the glass
‘Window robot’ in a listing tells you very little. Models differ in minimum pane size, edge detection, frameless-glass support, cable length and the cleaning products they allow.
Measure the individual pane rather than the whole window opening. Bars, handles, vents, stickers and decorative strips can obstruct the robot. Cracked glass or lifting film isn't a test surface at all.
Ask whether the model detects an edge or requires a frame. A frameless balcony is not safe territory for assumptions. The manual should also give the minimum pane size, any permitted incline and the operating temperature.
Checklist
- The exact model and its manufacturer instructions
- Pane width, height, thickness and frame type
- A smooth, sound surface without cracks or lifting film
- Enough cable and safety cord for the whole pane
- The cloths and cleaning product supplied
- Permitted temperature and moisture conditions
Send the owner a photograph and the window's dimensions. If the manual doesn't cover your surface, don't assume it's fine just because the robot sticks to the glass.
Check the socket and cable route too. The lead must not be stretched, trapped by the window or laid where somebody can catch it. If an extension is supplied, confirm how its connectors lock and how the manufacturer expects it to be used.
The safety cord is a back-up, not a decoration
First run the robot on a pane you can reach easily. Attach the safety cord to a stable indoor anchor exactly as the model instructions specify. A radiator, light item of furniture or window handle may not be suitable.
Use the exact model's safety system and the manufacturer's anchoring method, not an improvised cord or knot. Inspect the fixings and cord, and follow the manual's limits on length and working area. Route the power cable so it cannot obstruct the robot.
Some robots remain attached briefly on a back-up battery after power is lost. That is an emergency period for removing the unit, not a cordless cleaning mode. Learn the warning sounds and manual stop procedure before starting.
- Inspect the cord, clip, power cable and back-up battery.
- Keep people, animals and fragile objects out of the area below.
- Do not open the window or move the robot by its cable.
- Do not use it in rain, on cracked glass or outside the manufacturer's conditions.
Work through the windows in a set order
Use an easy-to-reach pane for the first test. Prepare the glass and clean pads as the exact model's manual requires: some modes need dry pads, others damp ones. Watch the first full cycle before moving to a less accessible pane.
Very dirty exterior glass may need two stages: an initial pass to remove loose dirt, followed by a finishing pass with clean cloths. Follow the exact model instructions and never pour liquid onto the body unless the manual says to do so.
Checklist
- List the panes and begin with the easiest one
- Check that the cloths are clean, fitted and prepared for the selected mode
- Inspect the edges and replace dirty cloths between panes
- Route the cable away from handles and furniture
- Clean the cloths and dry the kit before packing it
If streaks appear, swap out dirty or over-wet cloths before reaching for more product — extra liquid can make both grip and cleaning worse.
Have enough clean cloths for the whole job; one pair reused across many windows just moves the dirt around. Let the cloths and the robot dry before they go into a closed bag.
Record the condition and equipment twice
At collection, photograph the body, cleaning plate, cable, adaptor, safety cord, clip and every cloth. Switch the robot on and check for errors. Repeat the same photographs before returning it.
Ask the owner to demonstrate fitting, starting, pausing and removing the robot on an accessible pane. If it needs an app, check the account and connection before leaving, and make sure your personal data won't stay on the device.
Agree how cloths should be washed, which liquid may be used, how the kit is packed and what happens if an accessory is missing. If the robot stops or sounds unusual, switch it off and contact the owner rather than opening it.
If the robot falls, stop using it even if the casing looks sound — internal grip or battery damage may not show. Tell the owner roughly how far it fell and onto what, and send photographs.
Return the kit dry and packed as supplied. Coil the cable without tight bends, separate clean and used cloths and do not leave product in a leaking container. Keep the acceptance record until the deposit hold is released and outstanding claims are resolved.
Before reserving, ask how damage to the pane or sill would be handled if the instructions weren't followed. Home insurance may not cover that loss — written compatibility and operating terms are worth more than a broad claim that the robot suits every window.
Compare individual models in the window-cleaning robot category.
Related articles
 Tools and constructionRent or buy tools? A simple calculation and 15 examples10 min read
 Rent or buy30 things that often make more sense to rent than buy11 min read
Sources
Compatibility and safety advice is based on the instructions and support material for a specific ECOVACS model. Other robots can have different limits, so read the manual for the exact rental model before use.
- WINBOT W1S Instruction ManualECOVACS
- Installation and Use GuidanceECOVACS Support